Fashion is bullshit.
Wait, allow me to rephrase this statement – fashion is nice, but there is a lot of bullshit involved. For instance, have you ever looked at a GQ-type website or magazine and seen a cool-looking jacket or pair of with the headline “Affordable Summer Style,” and when you get to the part of price, that pair of jeans that’s supposed to be “affordable” is $125? For psudeo-worn denim?
This happens ALL THE TIME. Magazines and blogs that cover fashion think that everything, no matter what it is, needs to be in the high price range. Why do they do this? I suspect it’s because the theory is that if you are spending more money, you are getting better fabric, better construction and better fit. I also suspect it’s because if you ran a magazine you’d want companies who can get away with selling $125 jeans to advertise with you.
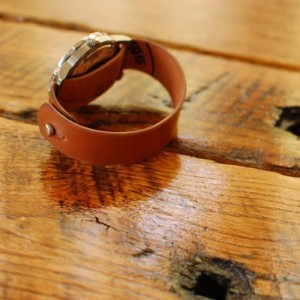
But that’s also bullshit (somewhat) and I am here to back up my claim. This nice looking button-stud shell watch sells for $105 on the form-function-form website and I am going to show you how to make it for a fraction of the cost. How much of a fraction you ask? How about roughly 1/10th?
All you need to make a nice watch like this is an existing watch face, a thin leather belt, a stud and something sharp. Let’s start with our materials:
1. A watch face.
Feel free to use an old one you have, or go buy a watch face at Amazon, or any craft store or website. Be sure to look at the watch you’ve selected and make sure that the pins (those two small bars on each side that the band would feed through to make a watch) are far enough apart to fit a piece of leather through. If you are using an old watch of yours, carefully remove the band and save it to use as a template. Here’s a hint to anyone actually following these instructions: cuff watches work best, as the space between the pins and the watch face are often bigger.
If you clicked on that link, you probably noticed that the watch on their site boasts of fine cordovan leather. This is all nice and good, but when you’re paying three bills for a watch, the last thing I’m thinking about is how awesome the person was who treated and aged a piece of leather.
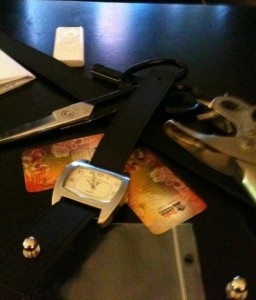
So what you should do is either find a belt you own but don’t need, or better yet go to a thrift store and buy one that someone else didn’t need. Belts work best for this as the leather will often be thicker, better quality and less likely to tear in a few months. Make sure that the belt is thin enough to thread through the watch and wide enough as well. I bought mine for $2.99, and as you can see its pretty much a black leather belt. Once you’ve found this, we move onto the last part.
3. A stud.
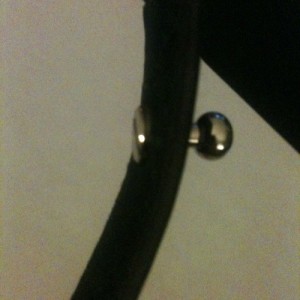
I’m not a hack so i’ll spare you that obvious joke. A button stud is the main piece that connects the watch and the easiest way to not have to buy a buckle and turn this into a gigantic project. Here is where I got mine. As you can see from the link, there are various sizes and colors. The 3/8″ one would be for what’s pictured and you can go smaller for thinner watches.
4. Something sharp.
For stabbing.
ASSEMBLY
Grab your materials and lay them out. Lay out your old watch with the old band to see how long it needs to be and then cut out the leather belt to match the size of the watch. Once this part is done, you are pretty much rounding third on this project, so feel free to step back and congratulate yourself on the work you have put in so far.
 Once you have the leather cut, you will need something sharp to make the hole that you will put your button stud through. If you noticed, the button stud unscrews, so the hole you are making should be big enough to fit that screw part though the leather. Take one end of the watch and leave yourself a little over 1/2 an inch from the end of the band to where you are puncturing a hole. When you’ve punctured through the leather, stick the screw part through the hole, then screw on the button stud part.
Next is placement of the watch face and the creation of the second hole that the button stud will go through. While the form-function-form website doesn’t show it, the button stud part should ideally be at the side of your wrist rather than the usual area on the inside of your wrist where watches buckle. What’s the best way to achieve this? Simple; thread the leather belt through the pins on the watch, leaving two and one-half inches from the end of the watch face and where you just put your stud in. An even more accurate way for you, the user is to hold the watch on your wrist and have the stud end be wherever you want it to be on your wrist. Once you’ve figured out where you like it, you are minutes away from being finished.

The last step is an easy one if you do it carefully. Grab something sharp (full disclosure – I used a leather hole punch for the holes) and you will want to either poke a hole on the other end of the leather (i.e.; the end where there the stud isn’t), or just cut a slit that will be big enough for that stud to fit through. The “be careful” part is due to the fact that since this is a thick piece of leather you only get really one shot and you won’t want to cut too big of a hole. If you really want to cheat, you can use the part of the belt that already has holes punched and make one of those holes bigger. Once you have that second hole punched, you’re done. You now spent barely any money on a watch that costs $105, which is both a celebration of your ingenuity and a middle finger to people who make stuff that looks worn and aged and sells it at high prices. You beat the system, and the system quietly respects you for it.
JW’s Links
9479.net – Higher Fashion than Most
9479 (radio) – Where everyone plays a game.


Hi there.
How is it possible that you don’t have any comment yet… So nice that you shared your experience with the WWW.
I was thinking in buying a button-stud strap before I saw your post, but from now on I will only build my own straps, including nato.
I am also very happy to be the first to comment and I will do even more, I will share the link to this post.
KUDUS to you!
Luís
Thanks for being the first! 🙂
Nice job there.
I figured this was possible, but didn’t see anyone who actually did it.
Where did you get the button stud?